This video will walk you through the initial design stages of a Canvas PowerApp and help you with the workflow design. This is to help you when first starting a Canvas App and will allow you to present your thoughts/ideas to customers easier while also providing you with some help finding blockers before they become a problem!
This is part of a series (videos can be found here) where we will be creating a lightweight application that’s driven by data from a third-party API via a custom connector built in Flow. The corresponding blog posts (blog posts of the series can be found here) will cover any documentation/notes mentioned during the videos.

Video
Notes
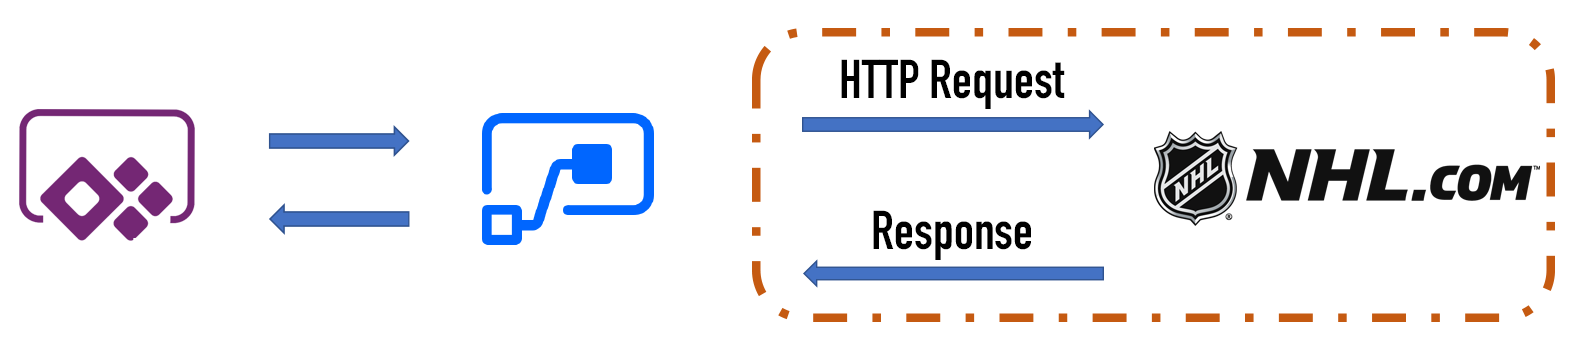
Below is the full image of the high-level workflow for our application we will be creating as mentioned in the video. The steps are as follows:
- Click an object on PowerApps which passes information to Microsoft Flow (in our case this would be a team number/name)
- A Flow is triggered from PowerApps
- The information passed from the PowerApp is stored in the Flow and passed to our Custom Connector
- The Custom Connector is triggered and requests the relevant information (in our case this would be the relevant team information)
- The Flow receives a response with the information
- The Flow cleans the information
- The cleaned information is passed from Flow to PowerApps (back to our application)
We can now use that information in our application and display it to the user.