
This blog post is to show you how easy it is in 7 steps to jump straight in to creating your own custom connectors with Power Automate. It will focus on creating the custom connector I previously made with my last video post connecting Power Automate and Companies House.

Pre-Requisites
This guide assumes that you have access to an API with the correct authorisation and that you already have a Power Automate account, with a general idea of the Power Automate Website (such as basic navigation). If you’re unfamiliar with the website you should take a couple of minutes familiarising yourself with it or alternatively check out my previous post here. You should be on the ‘Custom Connectors’ section of the website under the ‘Data’ menu before continuing. If you want to follow this guide and actually make the Companies House connector, then you will need to create an account and get an API Key.
Step One – Initialising and Naming your Connector
The first step is to start the custom connector process and to name your connector. Firstly, you will need to click the ‘+ Create custom connector’ button at the top right of the web-page. Once you have clicked this, a menu will appear and you should select the ‘Create from blank’ option, as shown below.

Once you have clicked the ‘Create from blank’ option, a pop-up window will appear for you to name your new custom connector. Simply enter a desired name and hit ‘Continue’.
Step Two – General Information
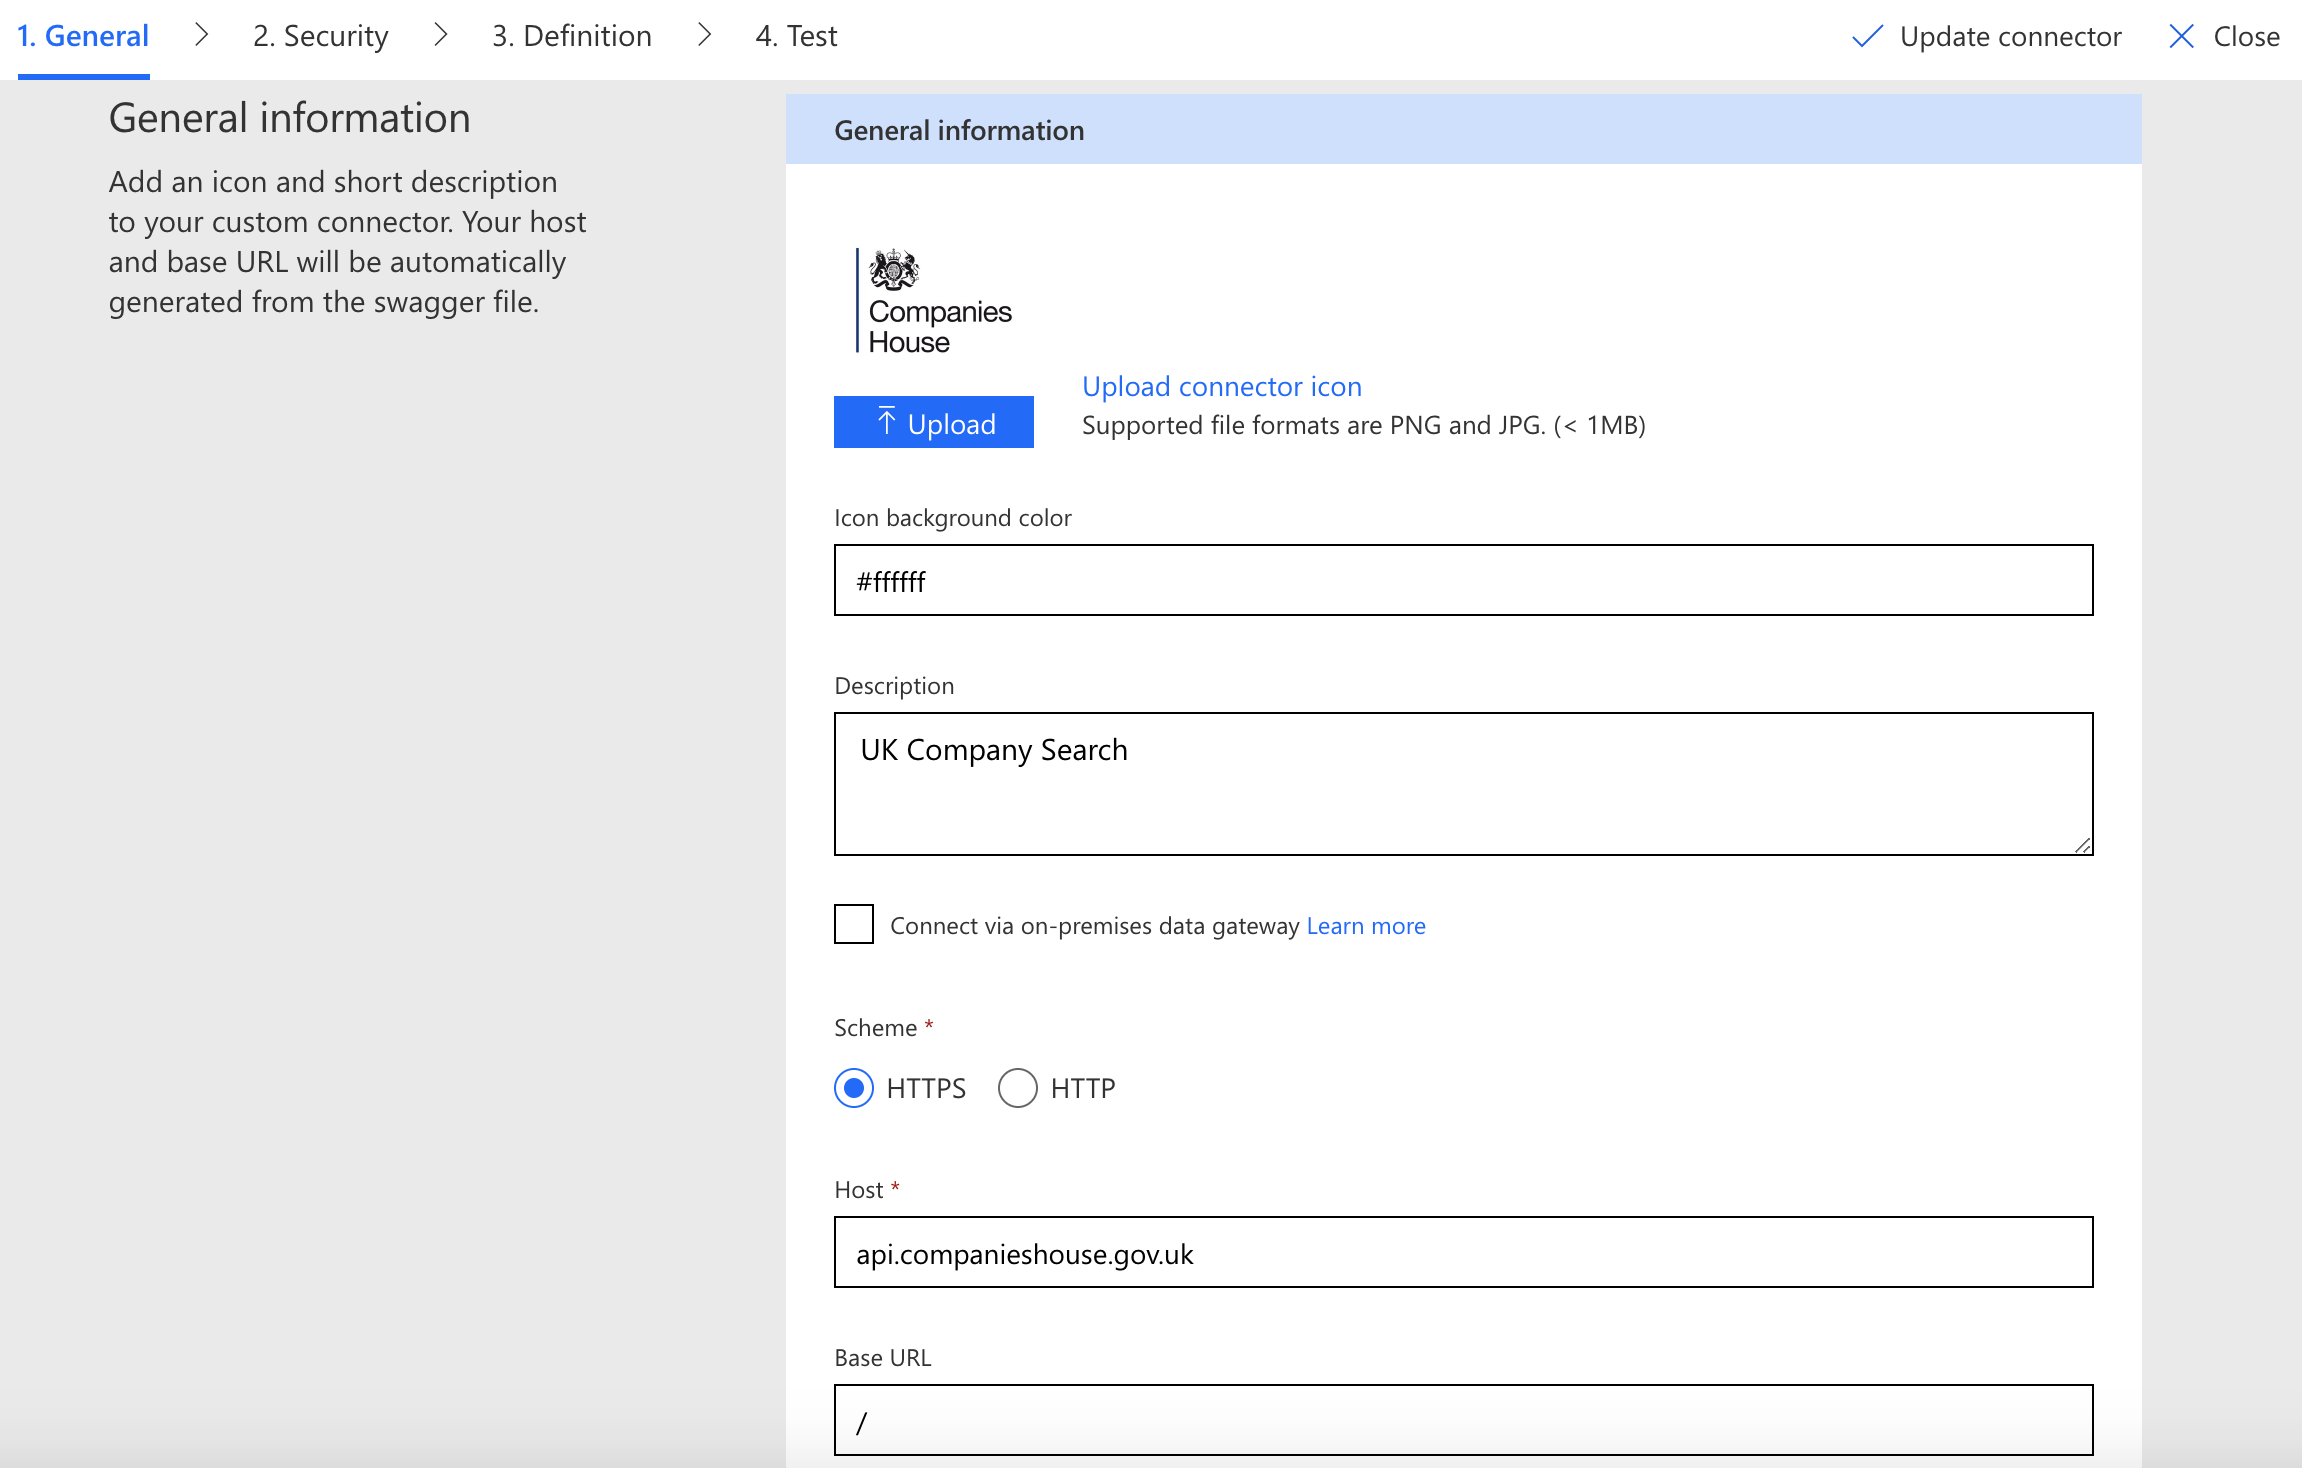
The general information section of the custom connector creation is where you upload an icon, set the icons back ground and provide the api host and base url. Simply upload you icon, choose a colour as the background and place the host in the host box. If like this example and there are many subsections of the API such as /companies/, /search/ etc then make sure to put the ‘Base url’ section as a simple ‘/’ (as shown below), when we get further on we will establish what sections we will call.
Step Three – Security
if you do not need authentication you can skip this step
The security step is to allow you, as a user, to authenticate with the API you’re using from a selection of authentication types and provide (if necessary) the authorisation details, such as a username and password or an auth token detailed below.
- No Authentication – No details need to be used to validate your connection
- Basic Authentication – A username and password to prove your authentication
- API Key – A unique value that is assigned to a user, signifying that the user is known
- OAuth 2.0 – This combines both authorisation and authentication and is ‘more secure’. The user logs into a system and the system will in-turn request authentication (such as a token). This will then be passed from the user as a request to an authentication server, which will either allow or reject the request.
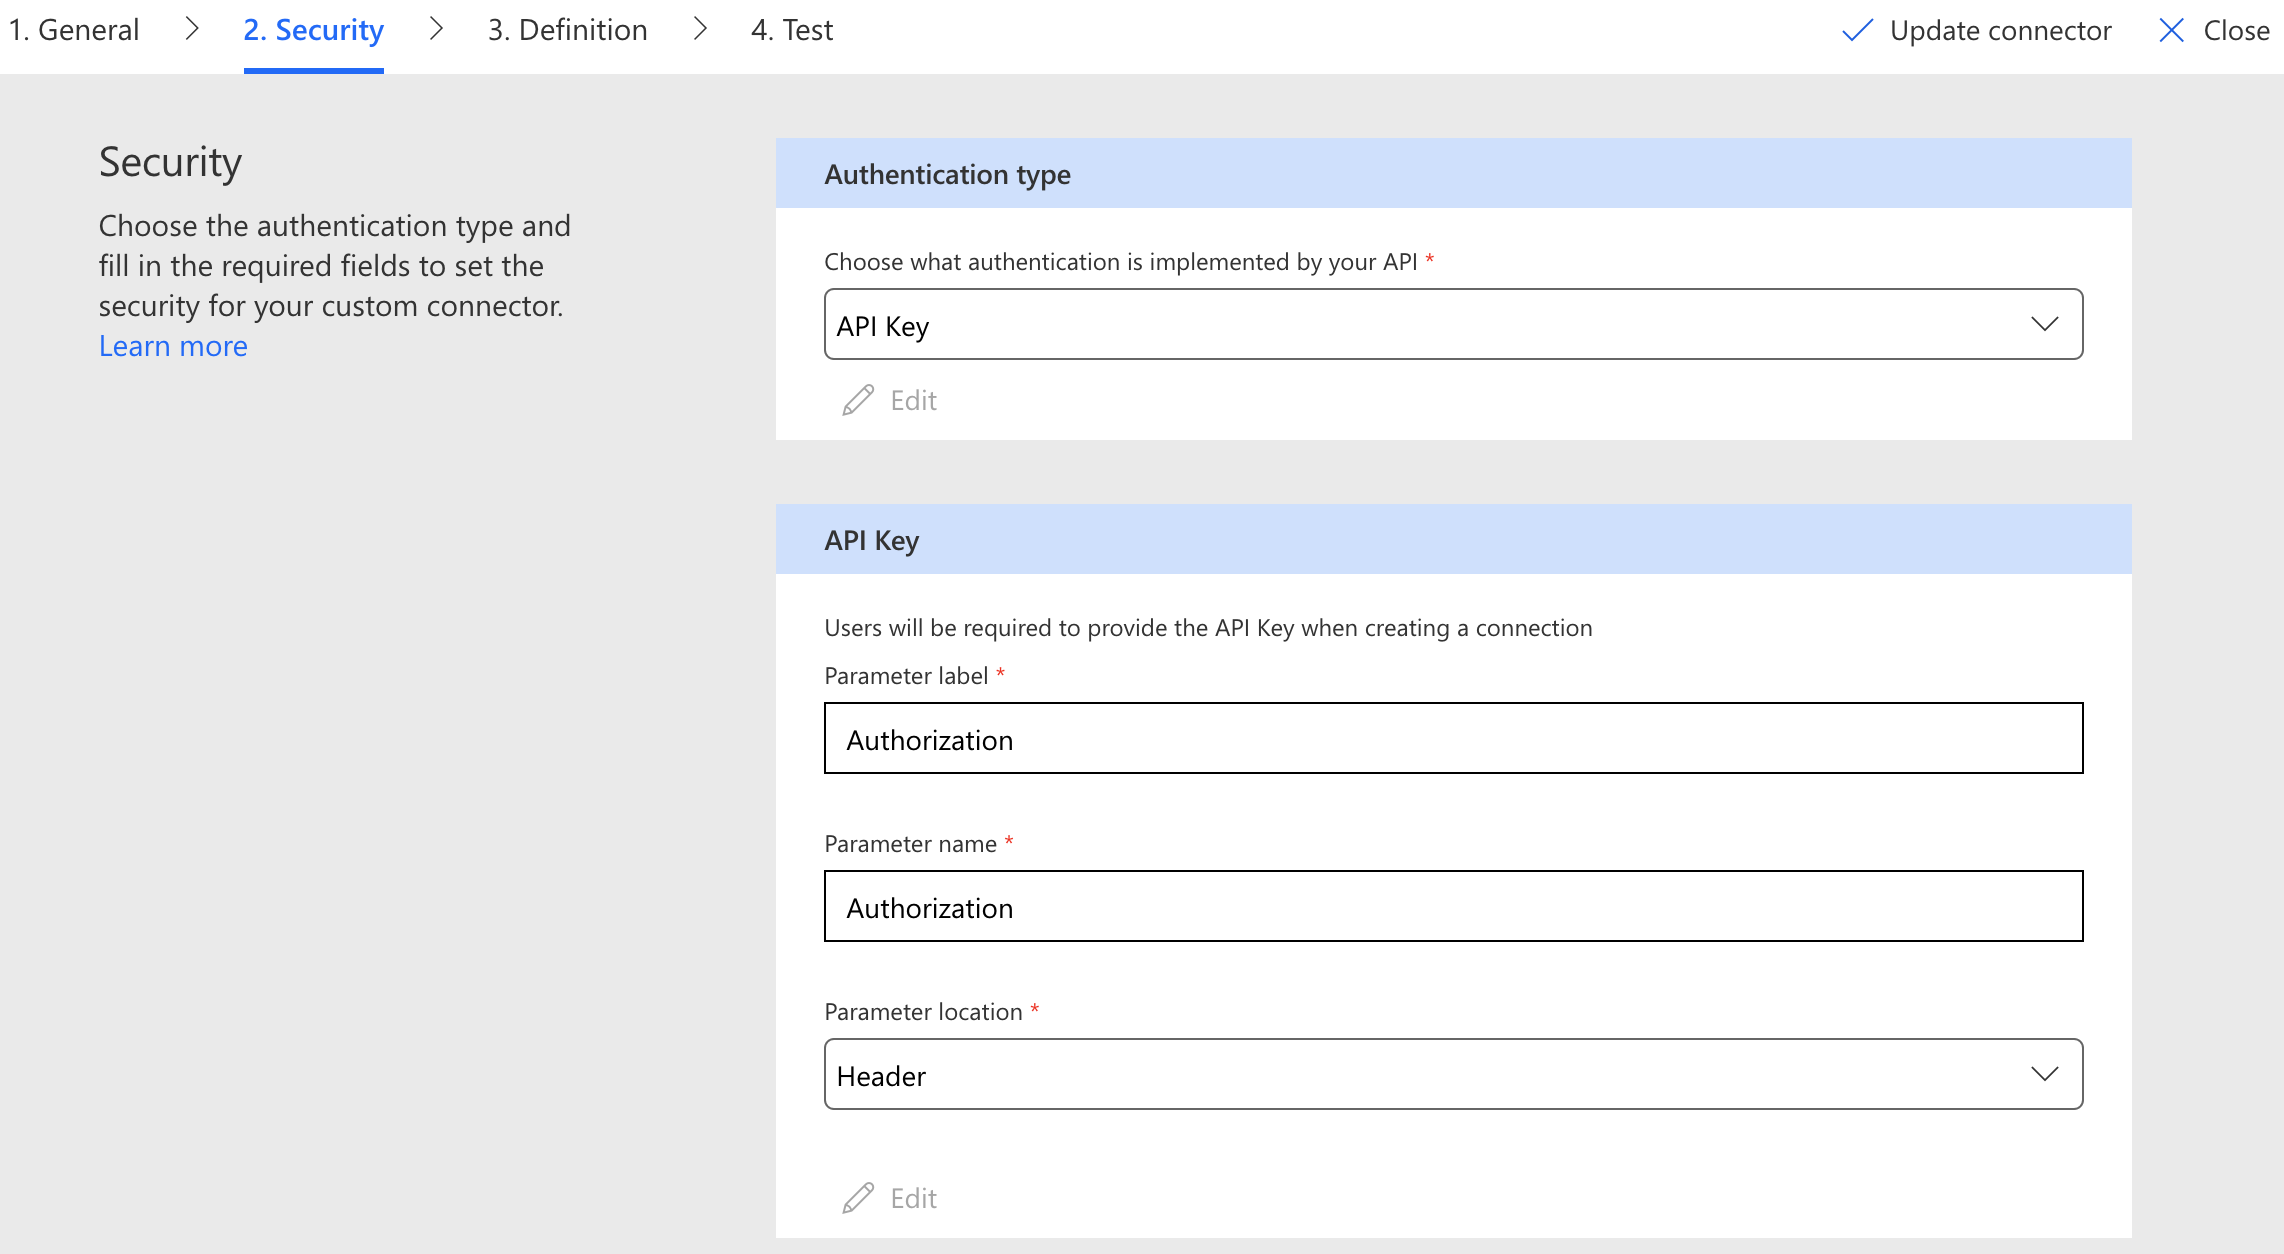
Firstly, click the dropdown menu for the ‘Authentication Type’ which is listed as ‘No authentication’ by default, as shown below.

For this example, we will use the API Key. The example being used (my first connector) requires an authentication token ‘Authorization’ to be passed through the header. The input of these fields can be seen below:
Step Four – Definition Creation
The next step is to simply create an Action, Trigger or Policy. This will be where we create our API call to allow us to retrieve, change or create information with API provider. This post will follow the first, creating an ‘Action’ as an example, as we’re simply creating our first custom connector. A more in-depth post about this page will be created in the near future.
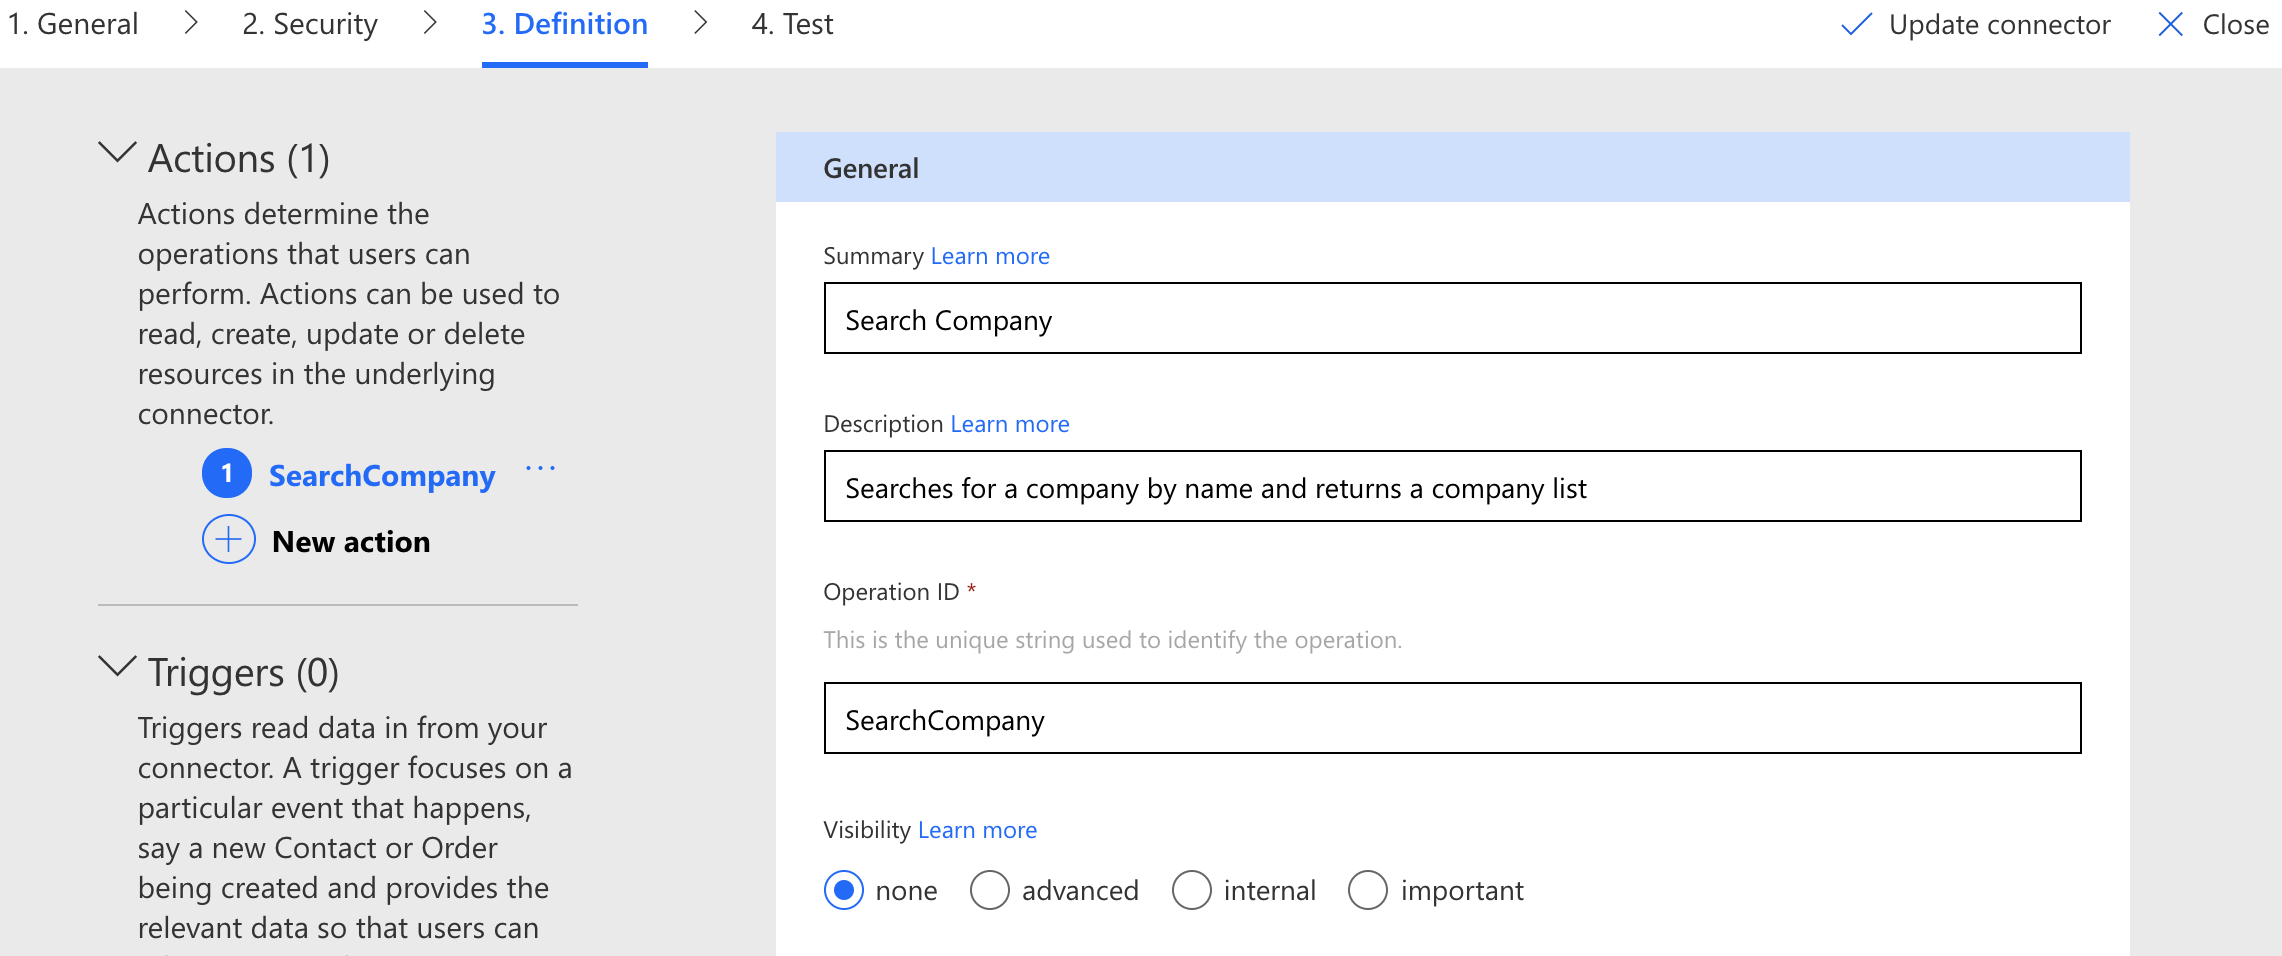
Click the ‘New Action’ button under the ‘Actions’ heading on the left side of the page. Once clicked, you will be presented with a ‘General’ section that contains Summary, Description, Operation ID and Visibility.
- Summary – This is the title
- Description – Simply describes what this action is doing
- Operation ID – The unique identifier for this action
- Visibility – Changes how the action will be shown to a user
You will want to simply fill these in with your relevant information before proceeding, below is a reference to my connector.
Step Five – Request (GET)
We’re now at the point where we can pass the additional url parameters and and queries relating to those to retrieve, change or update the information we need. As explained before, this is using a third-party API that provides information, therefore we will simply use ‘GET’ verb as an example. If you would like to learn more about the REST API verbs of flow, I’ll be writing a blog post explaining these in a bite-sized, easy to understand blog post in the future.
To continue, click the ‘+ Import from sample’ button on the Request header (shown below).

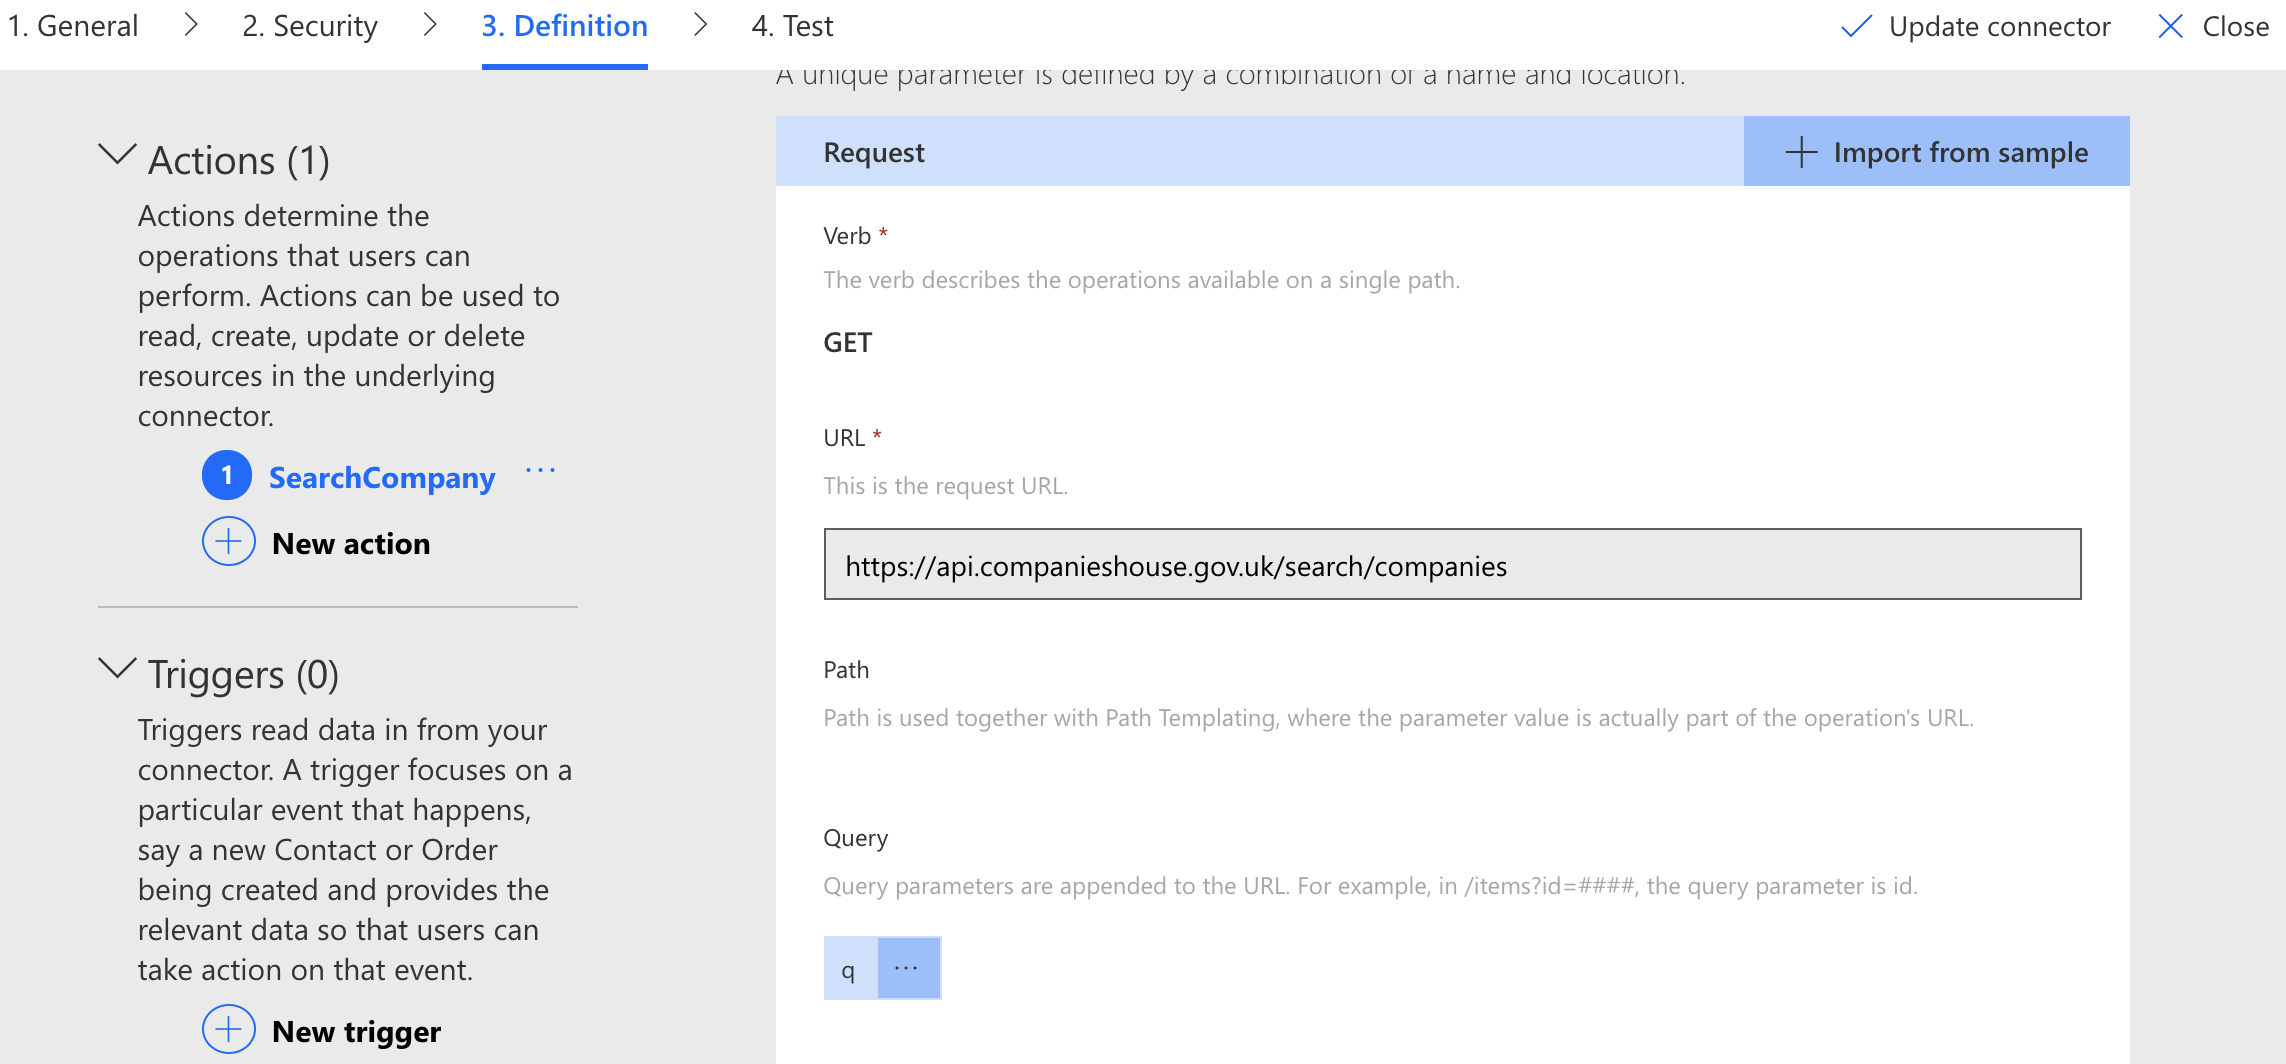
This will open the ‘Import From Sample’ sidebar. This is where you firstly select your verb such as ‘GET’ and then you need to provide the url path that this request will be calling. We previously placed the base API URL, this is where we now place the additional path such as ‘/search/companies’ which will allow me to use the companies section of the API. If you wish to use url queries (‘q’ is the query search for companies house) then simply add those onto the end of the URL with a ‘?’ first such as ‘/search/companies?q=’. You can then enter any headers you wish to user in the next section. Once this is done click ‘Import’.
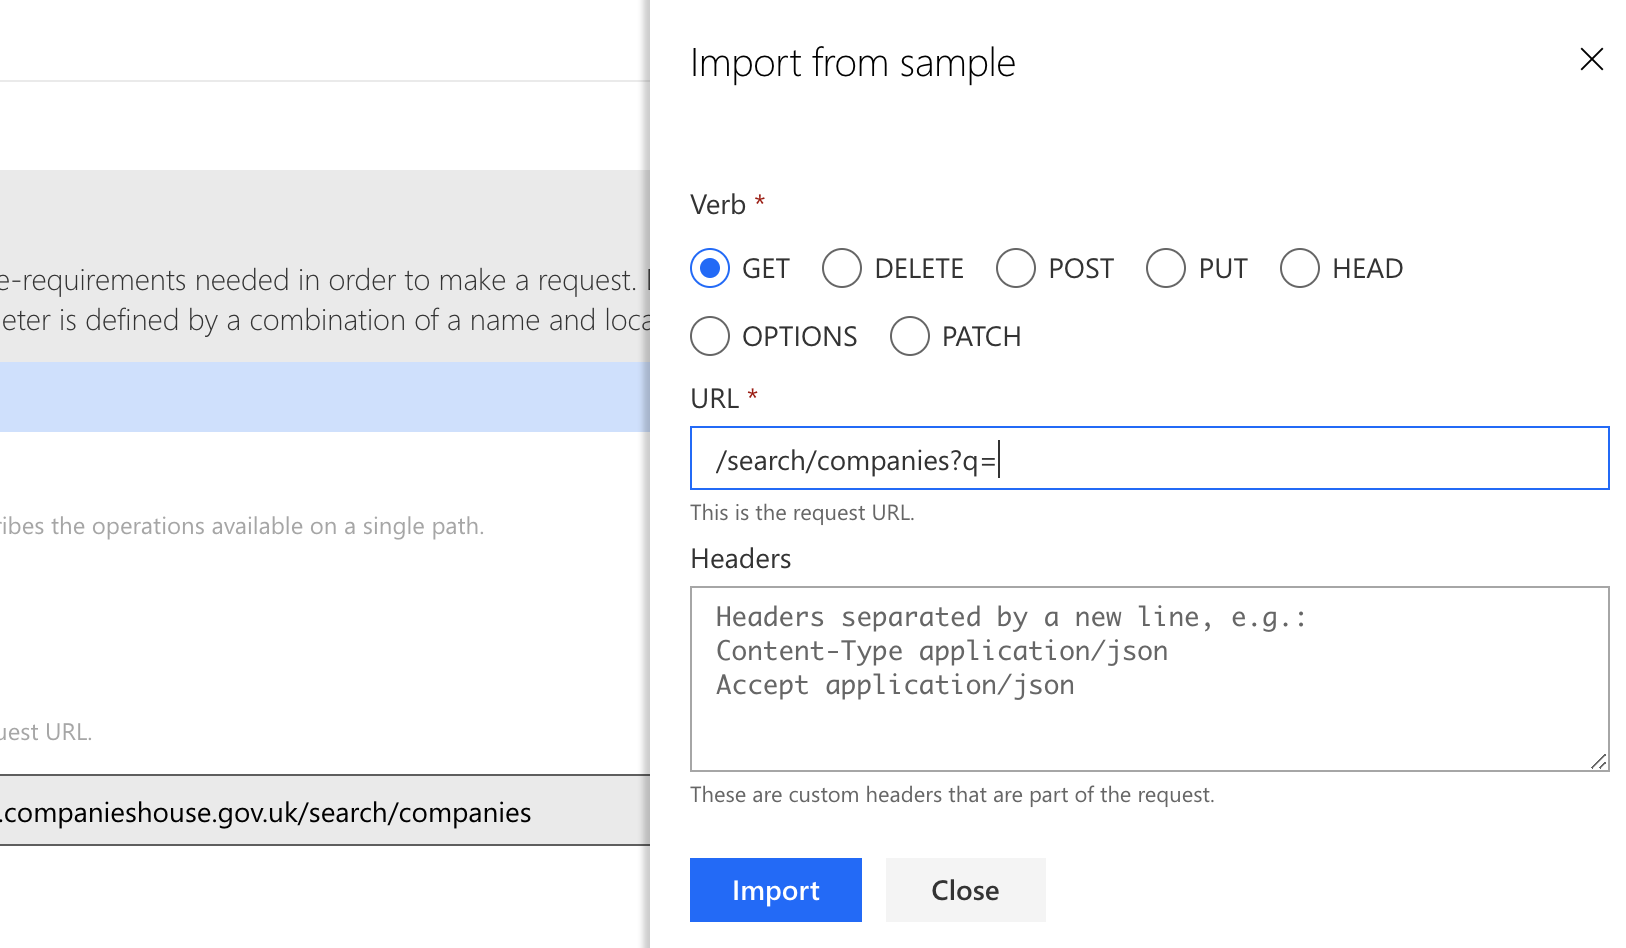
When the import button was pushed the sidebar would have closed and you will be presented with the completed Get Request section. As shown below, the queries are split from the URL and you now also have a full API url that your request will use.
Step Six – Response
This is where we handle the data being given back to us. Now, we can make our lives easy here by simply creating a dummy call and pasting the JSON response in rather than writing the JSON out ourselves (never bother doing this, it isn’t worth your time, ever).
Firstly, click the ‘+ add default response’ button to open the ‘Import from Sample’ sidebar (shown below).

There are several programs you can use to get an example response, I personally use Advanced REST Client, you simply provide the information that we used in the previous step and your authorisation, click go, and you get a response. You simply need to copy the JSON response and paste it in to the ‘Body’ section of the Response ‘Import From Sample’ sidebar and click ‘Import’. You will now be shown the default Response with the Body payload broken down into multiple parameters.
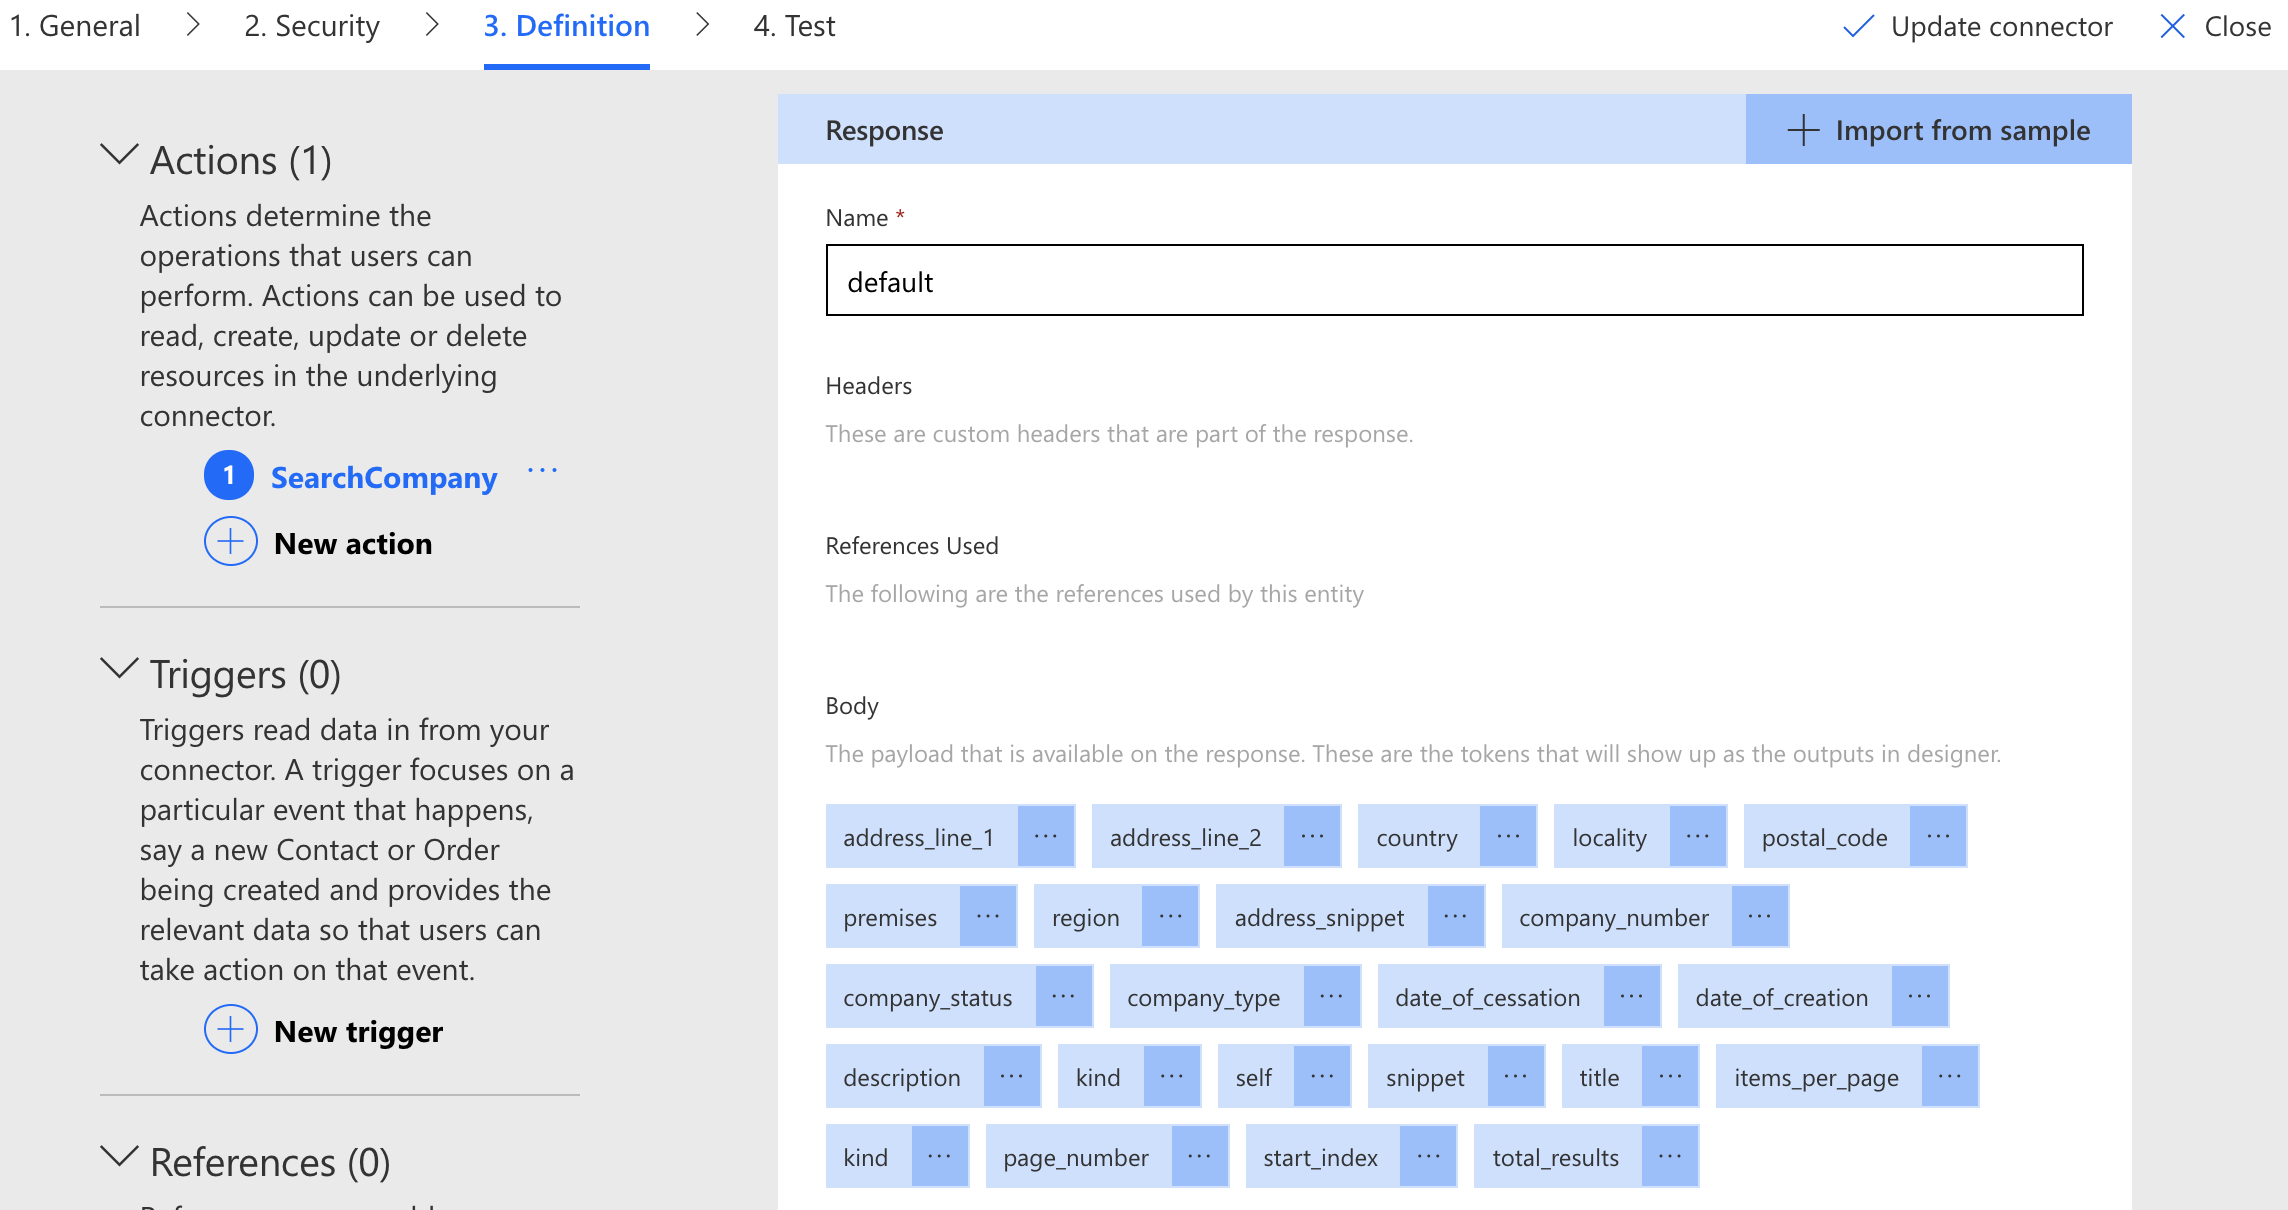
Once you get to this point, a validation process would have automatically kicked off to verify everything you have done so far on this page is correct. It should display ‘Validation succeeded’.

Step Seven – Test
Select your authorisation/Enter your details, complete any queries you have.

Click ‘Test operation’, if you have been following along making the companies house connector you should see the same response below if you used ‘Microsoft’ as a test example. If you’re creating your own connector from a different API, you should receive relevant information back from your query. You should also have a schema validation successful under the response.


One thought on “Creating a Power Automate Custom Connector in 7 Steps”
Comments are closed.